Home > Settings
Use the tabs to navigate the page – just as you would within the app!
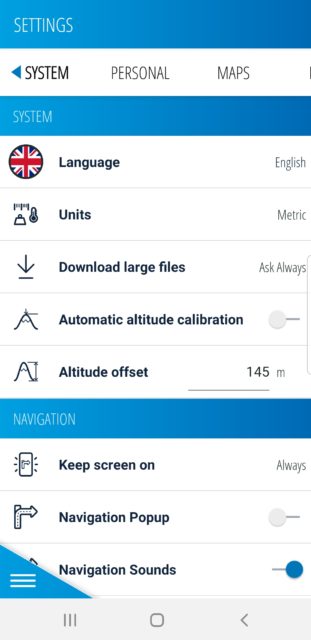
Within System, you can set the basic parameters of the application. Use the toggle buttons (on/off functionality) to modify the settings. To access the available options, simply tap the desired parameter.
System settings:
Language: You can choose the language you wish to use throughout the app.
Units: Measurement units can be set to “Metric” or “Imperial“.
Download Large Files: The application has to download large files from time to time (updates, map packs, etc.). You can set whether this should only happen while connected to a Wi-Fi network, or the app could use mobile data too in these cases. It can also be set to ask for permission before each download.
Automatic Altitude Calibration: Phones which have a built-in barometer are capable of determining the current altitude. If you wish to set a custom altitude manually, just turn off the “Automatic altitude calibration” option.
Navigation settings:
Keep Screen on: The option to decide whether you would like to keep the screen turned on while you are using the application.
Navigation Beep: A beeping sound will alert you before upcoming turns.
Navigation
Popup: The
upcoming
instructions
will pop up in
every
menu.
Head Up:
- While turned on, the map will rotate according to the current heading.
- While turned off, the map is north-locked unless being rotated manually.
Rerouting for battery conservation: The route will be optimized to extend the bike’s battery life.
Automatic Snapping of Tours: While navigating to recorded tracks, the route of the recorded path will conform to the road.
Use Compass for Map Rotation: While turned on, the map screen rotates according to the current orientation of the compass.
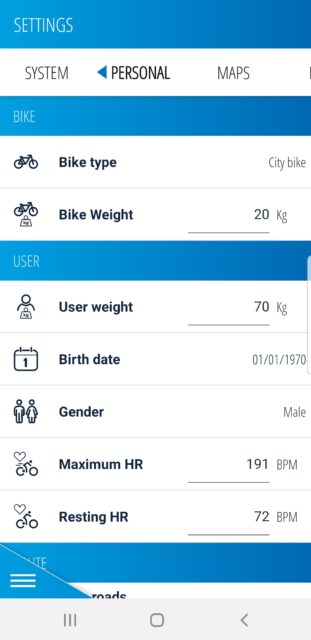
This screen lets you enter information about yourself, your bicycle, and your routing preferences. These settings are the same ones as you’ve seen during the first startup. Set your bike type, its weight, and your personal data, such as:
•
Weight
•
Age
•
Gender
•
Maximum heart
rate
•
Resting heart
rate
We use this data for more accurate calculations, e.g. calories burnt.
You can also set up your routing preferences for navigation – use the sliders to weigh the road types to be used during planning. To give an example, this can be useful if you don’t want to use gravel roads on your road bike but have no problem doing so while riding your MTB.
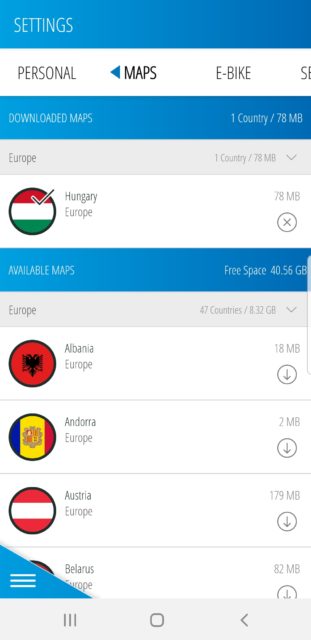
The ‘Maps’ tab allows you to download maps for countries which you would like to navigate in (offline mode). These maps will provide with additional information and details to the overview map (basemap) you downloaded upon the first startup.
Please, note that you cannot use the basemap on its own. To set up a navigation, you will need to download at least one map.
The tab header will display the number of downloaded maps and the space they take up on the device’s memory.
In case a new map update is available, the application will notify you on the Map screen and a constant message within the header of this tab. You can apply the update using the button in the notification bar.
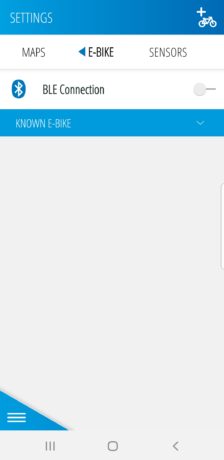
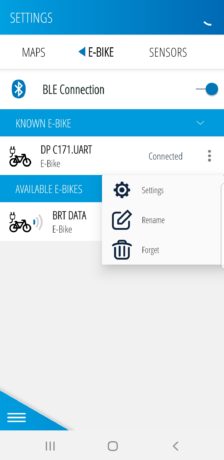
This menu allows you to look for nearby Fischer E-bikes. Upon opening this screen, the application will automatically begin searching for nearby bikes. Make sure that the Bluetooth on your phone and the “BLE Connection” toggle on the screen are turned on. When an E-bike is discovered, it appears under the “Available E-bike” section, where the signal strength is also indicated. Tap the bike to start the pairing process. Once paired, the bike appears under the “Known E-bike” part.
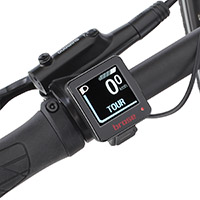
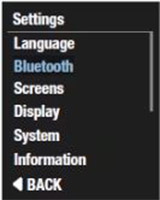
ATTENTION: If you have a FISCHER pedelec with Brose display “Allround”, you must first make the display visible to other devices for the initial connection with the app.
To do this, navigate to the “Bluetooth” item in the display settings and select “Connect Phone”. After this, the app can find the display.
If the searching process stops, you can restart it anytime by tapping the icon in the top right corner of this screen.
- Note: Only if both the phone’s Bluetooth and the “BLE Connection” toggle are turned on.
If a bike is connected, you have three options in the action overflow menu of the bike:
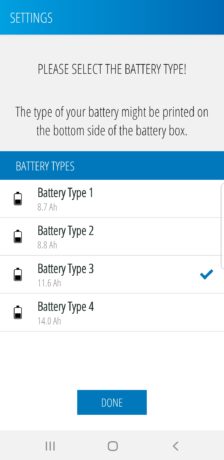
- Settings – where available, it allows you to select the battery type of the bike
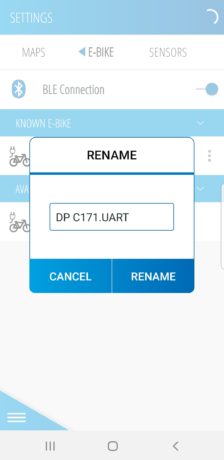
- Rename – allows you to change the displayed name of the paired bike
- Forget – the bike will disappear from the “Known E-bikes” and will be listed under the “Available E-bikes”
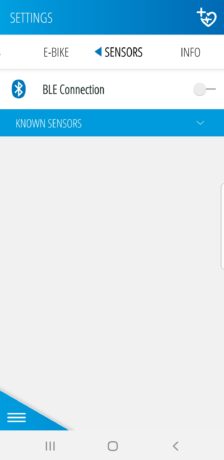
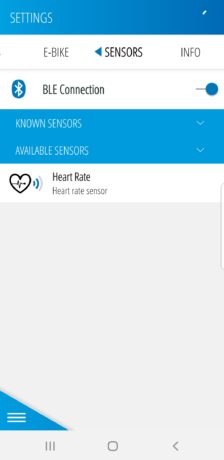
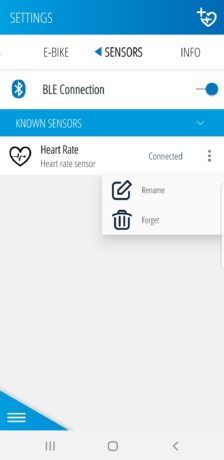
This tab displays the available and known heart rate sensors. Upon opening this screen, the application will automatically begin searching for nearby sensors. Make sure that the Bluetooth on your phone and the “BLE Connection” toggle on the screen are turned on. When a sensor is discovered, it appears under the “Available Sensors” section, where the signal strength is also indicated. Tap the sensor to start the pairing process. Once paired, the sensor appears under the “Known Sensors” part.
If the searching process stops, you can restart it anytime by tapping the icon in the top right corner of this screen.
- Note: Only if both the phone’s Bluetooth and the “BLE Connection” toggle are turned on.
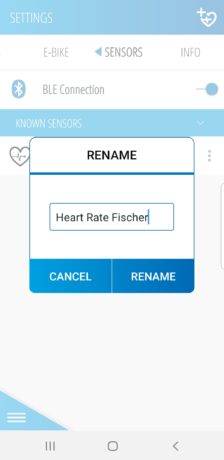
If a sensor is connected, you have two options in the action overflow menu of the heart rate sensor:
- Rename – allows you to change the displayed name of the sensor
- Forget – the sensor will disappear from the “Known Sensors” and will be listed under the “Available Sensors”
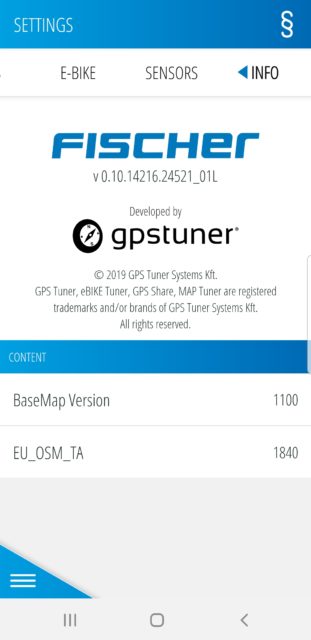
This INFO tab provides you with some core information about the application. This includes the version number and the version of the downloaded maps.
You can also access the EULA from this screen by tapping the paragraph icon in the top right corner of the screen.
